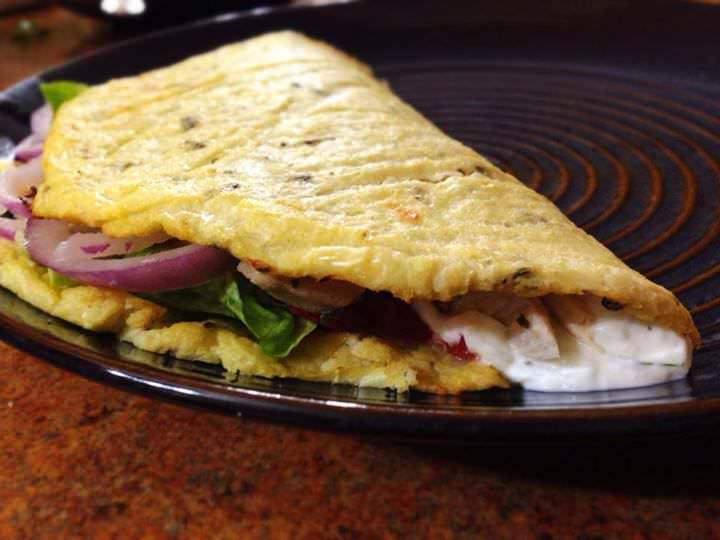
I recently started to get annoyed with the amount of carbs that are in wraps. I just don’t want to be stuffing an extra 8-12 carbs in my diet when it can be avoided, so I started experimenting. Through some horrible failures, I found a good recipe over at EmpoweredSustenance.
She found that using more egg in the mixture would allow it to hold together better when baking it. Bingo! Throw some spices and herbs in there, some gyro meat, and tzatziki sauce – and you have yourself a winner.
Yields 5 Toasted Garlic Cauliflower Wraps.
The Preparation
- 1 large cauliflower, cut into florets
- 4 large eggs
- 2 cloves garlic, minced
- 1 ½ teaspoons seasoning*
- 1 teaspoon salt
* Dried basil, oregano, or thyme is suggested.
The Execution
1. Preheat the oven to 375°F
2. Put parchment paper over 2 baking sheets.
3. “Rice the cauliflower” by pulsing the florets in a food processor.

4. Add 1/4 cup water to the riced cauliflower, and add it to a saucepan with lid.
5. Cook on medium high until tender. This is around 8-10 minutes.
6. Drain all the water out, and transfer the cauliflower to a kitchen towel.
7. Wring out the excess water from the cauliflower. This stage is vital – get as much water out as possible.

8. In a bowl, mix the cauliflower, eggs, garlic, herbs, and salt.
9. Form 4 thin circles on the parchment-lined baking sheets.
10. Press the dough down so it forms a thin layer – these will be wraps after all!
11. Keep the wraps fully formed and consistent. There should be no holes showing.
12. Bake them until they’re dry and pliable. This usually takes 15-20 minutes.
13. Let them cool on a wire rack, if you don’t let air circulate underneath, the bottoms will become soggy.

14. Do with them what you will – dip them in sauce, add some meats and cheese, or toss some vegetables inside. They’re really delicious with anything that I used to put in my wraps – including my Low Carb Chili Con Carne.

Try to serve them warm, out of the oven as they taste the best then. They store in the fridge pretty well, but they taste a heck of a lot better fresh.
This created 5 total LARGE wraps. You can fit a lot into these so I think they’re worth the carbs.
This makes a total of 5 servings of Garlic Cauliflower Wraps. Each serving comes out to be 102.4 Calories, 4.3g Fats, 5.81g Net Carbs, and 8.37g Protein.
| Garlic Cauliflower Wraps | Calories | Fats(g) | Carbs(g) | Fiber(g) | Net Carbs(g) | Protein(g) |
| 1 large cauliflower (840 g) | 210 | 2.35 | 41.75 | 16.8 | 24.95 | 16.13 |
| 4 large eggs | 286 | 19.02 | 1.44 | 0 | 1.44 | 25.12 |
| 2 cloves garlic | 9 | 0.03 | 1.98 | 0.1 | 1.88 | 0.38 |
| 1 ½ teaspoons Italian seasoning | 7 | 0.12 | 1.86 | 1.1 | 0.76 | 0.24 |
| Totals | 512 | 21.52 | 47.03 | 18 | 29.03 | 41.87 |
| Per Serving(/5) | 102.4 | 4.3 | 9.41 | 3.6 | 5.81 | 8.37 |

Toasted Garlic Cauliflower Wrap
Ingredients
- 1 large cauliflower cut into florets
- 4 large eggs
- 2 cloves garlic minced
- 1 ½ teaspoons Italian seasoning
- 1 teaspoon salt
Instructions
- Preheat oven to 375 F
- Put parchment paper over 2 baking sheets.
- Rice cauliflower by pulsing the florets in a food processor
- Add ¼ cup water to the riced cauliflower and add it to a saucepan with lid.
- On medium high heat, cook until tender (around 8-10 minutes)
- Drain water and transfer the cauliflower to a clean kitchen towel
- Wring out the excess water from the cauliflower. Remove as much water as possible. This is vital.
- In a bowl, mix the cauliflower, eggs, garlic, herbs, and salt.
- Form 4 thin circles on the parchment-lined baking sheets.
- Press the dough down so it forms a thin layer - these will be wraps after all!
- Keep the wraps fully formed and consistent. There should be no holes showing.
- Bake them until they're dry and pliable. This usually takes 15-20 minutes.
- Let them cool on a wire rack, if you don't let air circulate underneath, the bottoms will become soggy.
- Do what you want. Dip them in sauce, fill them with meat and cheese, make tacos, etc. Serve warm. They do store in the fridge, but are much tastier when fresh.

